
The Perfect DIY Decorations to Bring Some Glam to Your Party
DIY’s always make you feel accomplished in some way (at least for me it does). You have created something with your own hands. You did that. You are the man! You can do any DIY after this! I think everyone should do DIY’s when they have some spare time. It’s just a great feeling. On top of that feeling of accomplishment, you will also have created something beautiful to decorate the home (or wherever) for the party! How awesome is that?
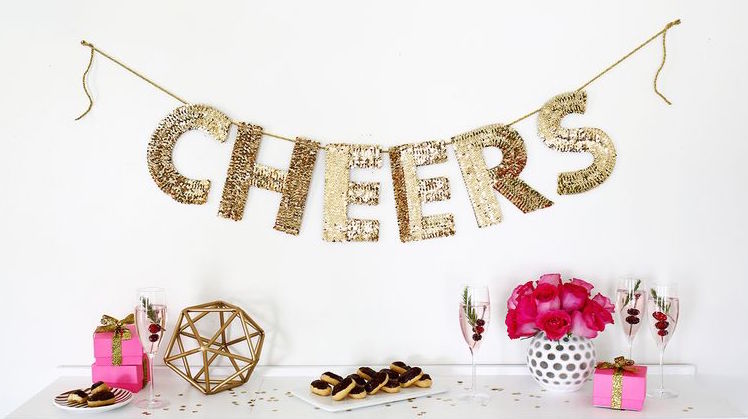
DIY Sequin Letter Garland:
Supplies:
- Stretch sequin gold trim (I recommend getting a little more than a yard for EACH tall letter)
- Scrap Cardboard
- X-Acto knife
- Hot Glue Gun
- Metallic Cord Trim
Directions:
- Print each letter in your phrase so you can use them as a template to cut out your cardboard letter. Choose a simple bold font (I used Function Pro Bold) and a font size that makes the letters just under double the width of your trim. The trim shown is a little over 1″ wide so the letter font is around 2″ wide so the trim would be sure to cover the cardboard. Tape each letter to some scrap cardboard and cut out the letter with an X-Acto knife.
- To make the ends of the trim look as neat as possible, you’ll want to fold and glue the ends under so the trim doesn’t unravel and drop sequins. So, at the end of the outside edge of your letter, use the hot glue gun to glue the trim end face down going away from your letter.
- Fold the trim back the opposite way and continue to glue the trim all around the outside edge of the letter. When you reach the other end, cut the trim so it hangs a little past the end, fold the trim under and glue in place. Repeat steps with the inside edge of the letter. Make sure both lines of trim are going in the same direction so they will look more like one piece instead of two.
-If you have a letter with intersections, don’t worry about doing the folds on places where you can cover those ends with another row.
- Once you have all your letters completed, you can line up your phrase (backwards of course!) and glue your hanging cord to the back of the letters. Once the glue sets, you’re ready to hang your DIY garland!
And here’s another simple DIY to help decorate your Party!
Glittered Engagement Ring Banner:

This giant DIY diamond ring banner is the perfect decor for a bachelorette party or bridal shower. It’s easy to make and so cute!
Supplies:
- Glitter Paper
- Eyelets
- An Eyelet Setter
- Ribbon
- Scrapbooking Adhesive
Directions:
Download the diamond shape and the ring shape, print, and then cut out the diamonds. Attach each circle to the diamond using scrapbooking adhesive. Set an eyelet in each ring then insert the ribbon or tulle through the eyelet hole.
Hang and celebrate!
Go now, my friends, and create your masterpieces to make your party that much more memorable!
Love,
That Bachelorette Show
Got Something to Say?